Chroma keying/IBK 3D Keyer
 The IBK 3D keyer was released in Composer R3 2023 and is a brand new type of Chroma Keyer not found in previous releases of Composer. The IBK 3D Keyer can produce highly detailed results and has several new configuration options, allowing for more advanced fine-tuning.
Image-based keying (or “IBK” keying) offers a solution to the limitations of traditional chroma keying. In the classic method, chroma keyers pinpoint a single RGB (or HLS, YUV, etc.) value to generate the alpha channel. For it to work perfectly, every pixel in the incoming image should mirror this exact RGB value. In reality, achieving this uniformity is challenging due to factors like inconsistent lighting, leading to variations in the green screen image. To accommodate these irregularities, chroma keyers either increase tolerance (sacrificing intricate details like hair) or boost softness (which can introduce incorrect transparency areas in the key).
In contrast, image-based keying employs a "clean plate." This plate, captured once the lighting and camera settings are finalized, provides a reference. The image-based keyer then identifies differences between this clean plate and the live video. As a result, each pixel in the live image gets its unique key color setting. This approach sidesteps the need to adjust for uneven green values, ensuring a more accurate extraction of fine details, including hair, transparent materials, and contact shadows—even if the backdrop's coloration isn’t entirely consistent.
Thanks to image-based keying, lighting subjects have become more flexible. Shadows formed by actual lighting can be kept and seamlessly integrated into the final composition.
The clean plate
A Clean Plate is “everything except the foreground/subject” and often only consists of the backdrop itself. The clean plate can be created by taking a snapshot of the backdrop or by using a tool such as Photoshop to remove the foreground and replace it with colors matching the backdrop.
The image below (right side) is an example of a Clean Plate:

The Clean Plate must represent the actual backdrop - if the light setup has changed, the camera has moved, or any other change has been made to your physical setup, you need to update the Clean Plate. For a 24/7 setup, the Clean Plate must be carefully observed to ensure that the physical setup and the Clean Plate match. If they don't match, you need to update the Clean Plate. If the Clean Plate is out-of-date and no longer represents the actual backdrop, the final key result will become degraded, and the power of the IBK 3D keyer will be limited or much worse than an HSV-based chroma keyer.
Creating the alpha channel
The IBK Keyer operates by comparing the foreground with the Clean Plate. The difference is used to create the key (alpha channel). When comparing the foreground with the Clean Plate, Composer renders three different channels.
These channels represent the difference based on a particular Color Space. Selecting a Processor will change the internal comparison model (or Color Space model). The selection of a Processor will affect the comparison model and internal mathematics - and the final chroma key results.
The default processor option is IBK3D, optimized for green screen setups. IBK3D is similar to the option HSV but with unique and unofficial properties that, in many scenarios, render a good base key for most green screen setups. In most use cases, minimal tuning is required to produce an excellent result using the IBK3D processor option.
The difference between the Clean Plate and the foreground can be adjusted by using the Balance controls. The gain of the three channels can be adjusted. Based on the selected Processor and your use case, you might want to tweak one or more of the channels using the Balance controls. More on this later in this chapter.
The final alpha can be adjusted using the Amplifier settings, including Alpha Gain, Alpha Gamma, and Alpha Ped controls.

- Settings
- Key channel- Select the backdrop color. This setting is primarily used for spill suppression. Options include
- No channel (no spill suppression)
- Blue channel
- Green channel (default)
- Clean Plate - Select an image (.png or .jpg), as the Clean Plate.
- Process channels- Select which channels to process when calculating the key. In most use cases, the All option is the most efficient.
- All - use channels A,B and C (default)
- A channel only
- B channel only
- C channel only
- A and B channels
- A and C channels
- B and C channels
- Processor - Selects the color space model used for processing the inputs. This selection will affect the internal processing engine of the keyer, and the different options will render very different results.
In most green screen scenarios, the IBK3D processor is preferred, but depending on your setup, the other processor might render a better result. IBK3D is a proprietary model designed for Composer.- IBK3D - model optimized for green screen scenarios (default)
- RGB - model based on the RGB (Red, Green, Blue) color space
- HSV - model based on the HSV (Hue, Saturation, Value) color space.
- Keyer output- Selects the output of the keyer. Most of the options are self-explanatory, except for a few. The output options Intermediate, IntermediateMax, Alpha, and Final are the most commonly used options when calibrating the keyer. The other options might be helpful but are rarely used.
The Keyer output can be toggled by the Function Keys when the operator is selected. Below is a list of the options:- Foreground - Foreground only (F1)
- CleanPlate - CleanPlate only (F2)
- Intermediate - The difference between the Foreground and Clean Plate. Use this option to study channel processor results and the output consists of three channels: Red colors represent the Channel A difference (foreground minus clean plate), Green colors represent the Channel B difference, and Blue color represents the Channel C difference. This output option is useful when calibrating the Balance settings. (F3)
- IntermediateMax - Shows the maximum level of all three channels. This is equal to the alpha channel but without the Amplifier settings applied. (F4)
- Alpha - Shows the Alpha after the Amplifier. (F5)
- Suppressed - Shows the spill-suppressed foreground. (F6)
- SuppressedWithAlpha - Same as Suppressed, but with an alpha channel (F7)
- Spill - Shows the level of spill on different parts of the foreground (F8)
- SpillRestauration - Shows the restauration color (F9)
- Garbage - Shows the garbage matte only. (F10)
- Background - Background only. (F11)
- Final - The final output. (F12)
- Key channel- Select the backdrop color. This setting is primarily used for spill suppression. Options include
- Balance - Adjusts the balance between the three processor channels. The channels A, B and C will correspond to the channels used by the Processor. For example, If you pick the HSV processor, Channel A will represent the Hue, Channel B the Saturation, and so forth.
Use the Balance settings to adjust the gain of each channel. For most green screen setups using the IBK3D processor model, the gain of channels B and C are the most relevant. - Amplifier - Use the Amplifier to adjust the Alpha channel
- Alpha Gain - Adjust the alpha gain
- Alpha Gamma - Adjust the alpha gamma curve
- Alpha Ped - Adjust the alpha Ped (or Lift)
- Clipping (black) - Clipping in the black
- Spill Suppression- Removes the selected Key Color (“spill”) from the foreground.
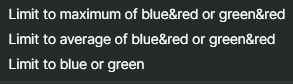
- Type - Spill suppression algorithm
- Spill Suppression Amount - The amount of spill suppression (0-100).
- Screen Color Compensation - If the background (screen) has an un-pure green- or blue color, this option will improve spill suppression. Read more about Screen Color Compensation.
- Compensation Boost - If Screen Color Compensation is active, the screen color compensation level can be boosted using this setting. Use with care.
- Type - Spill suppression algorithm
- Spill balance- For non-pure green/blue backdrops, the spill balance feature be used to fine-tune the spill balance. Ideally, the spill suppressed output should be neutral gray.
- Use Spill balance - activates/deactivates the spill balance feature
- Red, Green, and Blue - color channel balance/compensation.
- Spill Restauration- The Spill Restauration options help restore (or improve) the areas where spill suppression occurs. This is useful if the foreground has spill on the edges, for example, in the hair of a person in the foreground.
- Type - Select which type of spill restoration to use
- None - No spill restauration
- Luminance - Restore luminance in the despilled areas of the image
- Tint - Tint the despilled areas of the image
- Gain - How much gain to use for spill restoration.
- Type - Select which type of spill restoration to use
- Tint
- Saturation - Select saturation
- Hue - Select Hue to use as tint color
- Pick hue from layer - Toggle on/off. When selected, the tint color will be picked from the selected Background layer instead using the "Hue".
- Background layer - Select which scene layer to use for picking the tint color
- Options
- Invert Alpha - Inverts the alpha channel.
- Interpolation - The type of internal color interpolation (Linear or Cardinal)
- Garbage matte image - An optional matte image can be used to add a garbage matte. See more information about Garbage matte under the section Insight: Chromakey - About Garbage matte
- Use garbage matte - Checkbox for activating/deactivating the use of the garbage matte image.
- Performance and properties
- Message - Log mini message
- Internal processing time (ms) - Processing time for rendering the operator
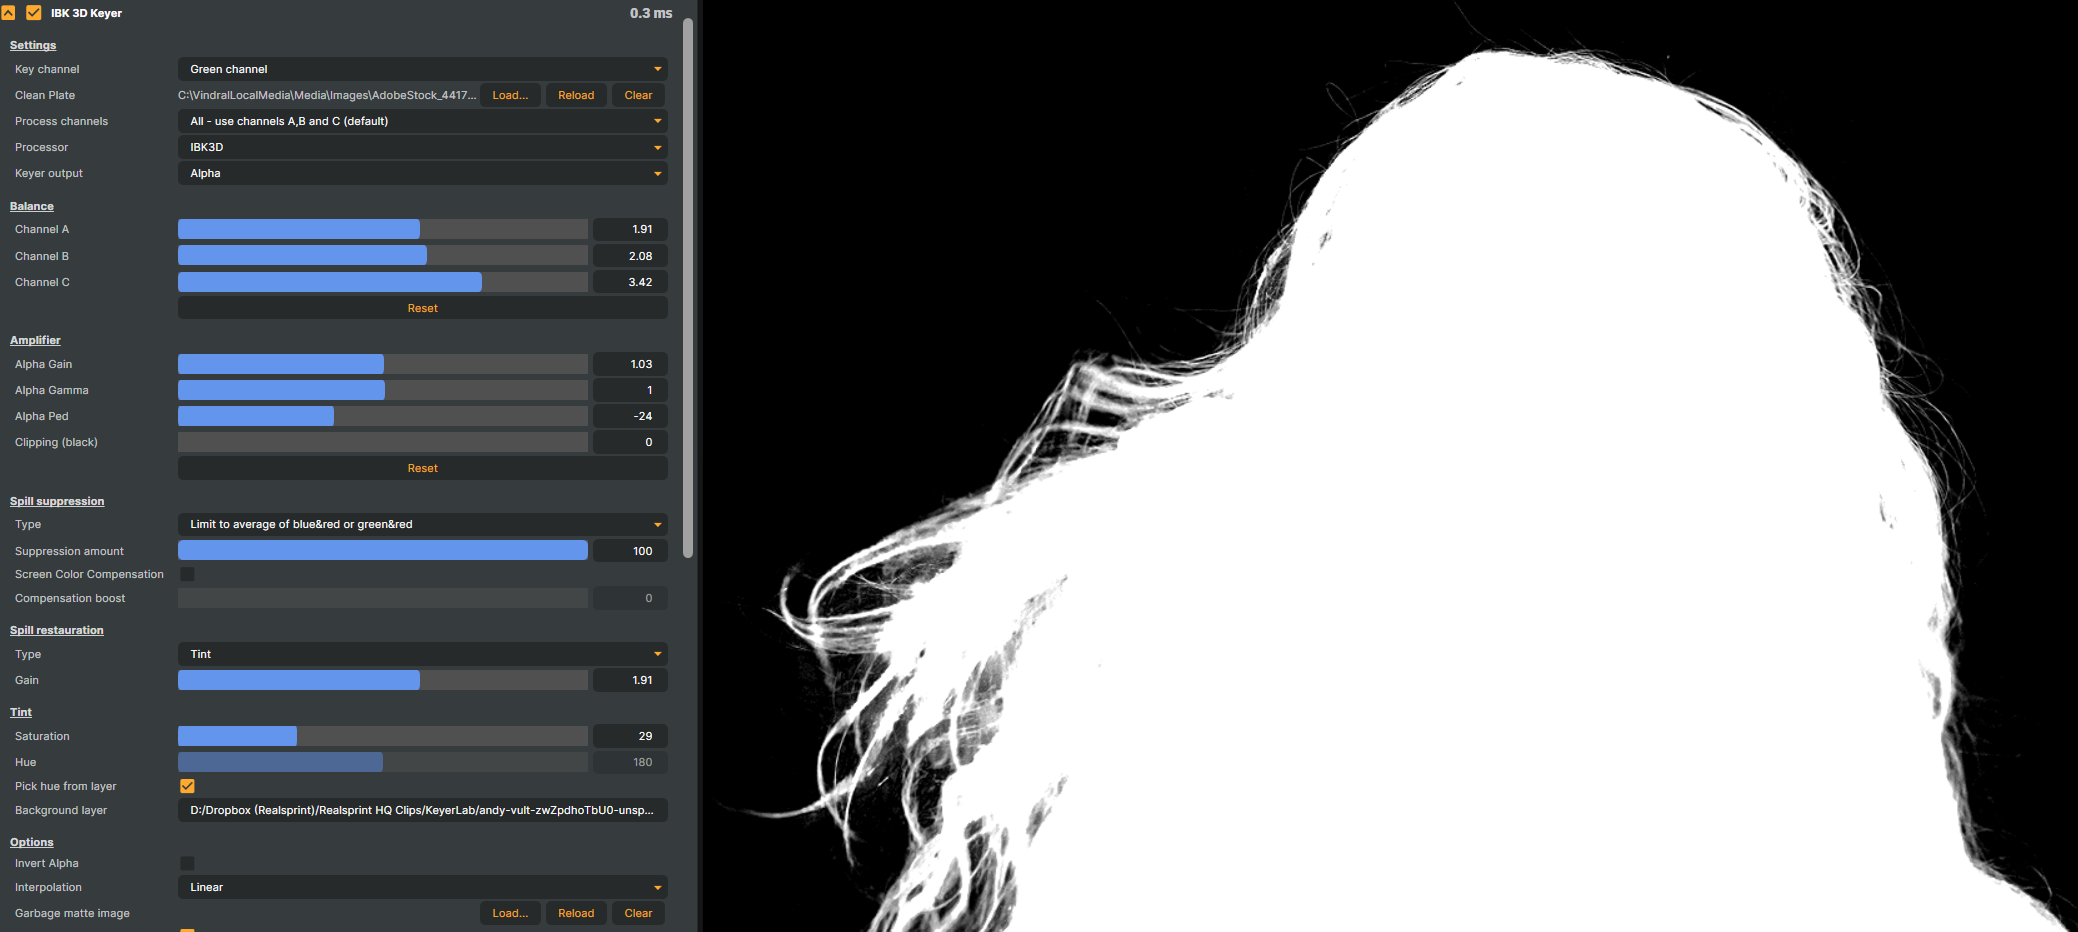
IBK 3D Keyer example:
How to use the IBK 3D keyer
If your studio setup contains static objects that should be solid, or if your backdrop has areas that are hard to key out, you should use a Garbage matte image or pick a garbage matte layer. A garbage matte is usually added before trying to fine-tune the keyer configuration.
- Select a key channel (green or blue). Your selection will affect the spill suppression algorithm.
- Select a clean plate image or select a layer containing the clean plate.
- Select a Processor. The IBK3D option is the most efficient in most cases, but HSV or any other model might work better in your use case.
- Adjust the Balance between the three channels. Study the IntermidiateMax channel and try to find a balance that creates a solid key while keeping the softness of the edges of your foreground. If you want to study the difference per channel, select the Intermediate output channel, which will render an RGB image based on the difference between the three channels.
Do not increase the balance levels too much - it may produce hard and unnatural edges.
For many green screen scenarios, you only need to adjust the Channel B setting. Increasing it to a value of 1.1-1.3 can be sufficient. Again, the ideal configuration depends on your studio setup and the foreground colors.
Images below: IntermidiateMax (left), Alpha (right)
- Amplifier: Use the Alpha Gain, Alpha Gamma, and Alpha Ped to adjust the key (alpha) as seen in the IntermideateMax output. Select the Keyer Output option to Alpha to study the alpha channel based on your amplifier settings. Switch to Keyer Output Final to view the final result.
Be careful not to push the alpha settings too much, as it may render hard edges. Before pushing the alpha, try to fine-tune the balance settings.
You should iterate steps 4 and 5 to find the best settings. - Amplifier: Try using the Clipping (black) to remove noise in the key. Be careful when using this option as it might render hard edges on your soft matte (edges).
- Spill Suppression: Adjust the type of spill suppression to the option that renders the best results for your use case. Select the Keyer Output option Suppressed to study the suppressed output and try adjusting the spill suppression Type to find the optimal result. If you have a green screen setup, no green artifacts should be visible in the suppressed output.
If needed, adjust the Spill Suppression Amount. In most use cases, the amount can be left at the default value of 100. - If the color of your screen (background) is not pure green or pure blue, you can use the Screen Color Compensation and Compensation Boost options to improve spill suppression.
- Use the Spill Restoration options to fine-tune how edges are processed and restored. All kinds of spill suppression will affect the luminance, saturation and hue of your output. The default Spill Restauration Option of None will leave the spill-suppressed output (edges) as is. However, in some use cases (mainly depending on the background and the light setup), you might want to fine-tune the edges (= the spill-suppressed areas)
The IBK 3D Keyer has three options for Spill Restauration:
- None - no restauration. Luminance will be slightly lower after the spill has been removed.
- Luminance - restore the luminance of the despilled areas.
-Tint - manually a manual hue & saturation, or activate Pick the hue from the background layer
First, try the Luminance option and adjust the Gain until you get the most natural result. Switch to Tint, and set hue, saturation, and gain manually. Activate the option Pick hue from the background layer and see if that looks better than the manually set hue.
No single configuration works best - you have to play around with the parameters to find the optimal configuration for your use case. However, in most cases, the Tint option + Pick hue from the background layer renders good results.
IBK 3D Keyer example:

Alpha channel example: