Media file input/ Video file input
Video file input supports playback of video clips, looping playback, and automatic startup.
.png)
- Show advanced option - Toggle to show/hide advanced options.
- Media source- Use the Load button to load a clip into Composer. If a clip has been loaded, but the file has been modified, you can use the Reload button to refresh the clip in Composer. Use the Clear button to unload the clip.
- Supported video formats
.mp4,.avi,.mov,.mxf,.dvclips encoded with supported video codecs. - Audio track limitation
Media files containing more than two (2) audio tracks are not supported. If such a file is loaded, Composer will display a warning and immediately stop playback.
- Supported video formats
- Playback state - Current playback state
- Commands
- Play button - Start playback
- Pause button - Pause playback
- Stop button - Stop playback
- Log - Displays video input log messages
- Configuration
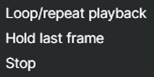
- End-of-file behaviour - This determines the action to perform at the end of the file. The options are Loop/repeat playback, Hold the last frame, and Stop.
- Reduce VRAM usage - Minimizes GPU memory during playback but increases the GPU load when stopping or rewinding.
- Synchronize playback - All Movie inputs with this checkbox active will start their playback in sync.
- Start playing when loaded - Check this option to automatically start playback when the file is loaded (Default).
- Start playing when media changed - Automatically starts playback when a new media file is selected.
- Video decoder thread count - Number of CPU threads used for decoding.
- Prefer hardware decoding - (Default enabled) The GPU (NvEnc) will decode the file if enabled. This will reduce the load on the CPU and is preferred for all h264 and h265 clips. (To enable this feature, the video file must be stopped first)
- Hardware decoding active - If yes, the GPU is used to decode the file . The video file must have a resolution of a minimum of 48x48px.
- Cue points JSON - By adding a JSON array, it is possible to call a connector on a specific frame. This will trigger one or more events.
In the example below, after 100 frames are played, it will trigger a connector called "TOP". After 200 frames, it will trigger the connector "FRONT".
Example: [ { "100": "TOP" }, { "200": "FRONT" }]
- End-of-file behaviour - This determines the action to perform at the end of the file. The options are Loop/repeat playback, Hold the last frame, and Stop.
- Script Engine Functions (optional)
- On End-of-File - Advanced option. Specify a callback function for the Script Engine. Executed when the video file has ended.
- Icon
- Icon text - short descriptive text used in the input list. Limited to 5 characters.
- Audio mixer
- Hide in the audio mixer - if this option is set, the input will not appear in the audio mixer.
- Performance and properties
- Width - Media width in pixels.
- Height - Media height in pixels.
- Avg video decoding time (ms) - Time in milliseconds to decode the current frame.
- Current time - Current playback time (Time code) in hours:minutes:seconds:frames.
- Duration - Total duration of the loaded video file.
- Time left - Time left until the clip ends.
- Number of loops played - Number of loops performed.
- Dispose LibAv parser at stop - Composer will dispose of the LibAv library when playback is stopped or looped.
- VideoTrackInfo - Detailed debug information on video track properties.
- AudioTrackInfo - Detailed debug information on audio track properties.
- Render Options - These options, together with
Render Tuning(see Performance and Options), help optimize performance by letting Composer automatically decide whether the input should be rendered.
When your project’sRender Tuningoption is active, Composer manages each input’s rendering automatically for best performance.
These options allow you to override that behavior and manually decide if this input should be rendered or excluded from the scene.Render Tuning vs Render Options- Render Tuning works at the project level (see Performance and Options), automatically managing which inputs are rendered across all Scenes for optimal performance.
- Render Options work at the input level, letting you manually override or fine-tune how a specific input behaves within Composer’s automatic rendering process.
Additional performance tips
Beyond the settings covered above, the following resources provide additional guidance on optimizing Composer's performance on your system:
Invisible (do not render in scene) - The input will not produce any visible output in the scene, regardless of whether Render Tuning is enabled at the project level.
- Do not render input
- Let Composer decide (default) - Composer automatically decides whether the input should be rendered, based on the active Scene and if Render Tuning is enabled.
- Manual configuration - Allows you to manually control rendering behavior using the Render switch (see below).
- Render - A toggle switch is available only when Manual configuration is selected.
- Optional TAGS

- TAGS - Add a "tag" for the input smart search function. You can assign multiple tags by separating them with a SPACE character.
- Resolution
- Width - Video width (pixels)
- Height - Video height (pixels)
* Debug properties. Only visible if "Show debug properties" are enabled in Settings.
Audio Configuration and Processing options
For inputs capable of processing audio, additional audio configuration and processing options are available through the Audio Mixer and the Channel Strip Inspector.
- Audio Mixer — Monitor levels, adjust gain and pan, mute/solo inputs, and configure auxiliary sends to Audio Channel Strips—all from a centralized mixer-style interface.
- Channel Strip Inspector— Access advanced audio processing options by selecting the input's mixer strip:
- Input trim, stereo remapping, and audio delay
- Channel mapping
- Gate
- Low cut filter
- Equalizer (5-band parametric EQ)
- Compressor
- Limiter
See Audio Mixer and the Channel Strip Inspector for more detailed information.
Video/audio with alpha channel:
It is possible to use a video containing an alpha channel. Save the video file as a .mov file with the video codec "Quicktime Animation", in colorspace RGBA (with alpha channel).
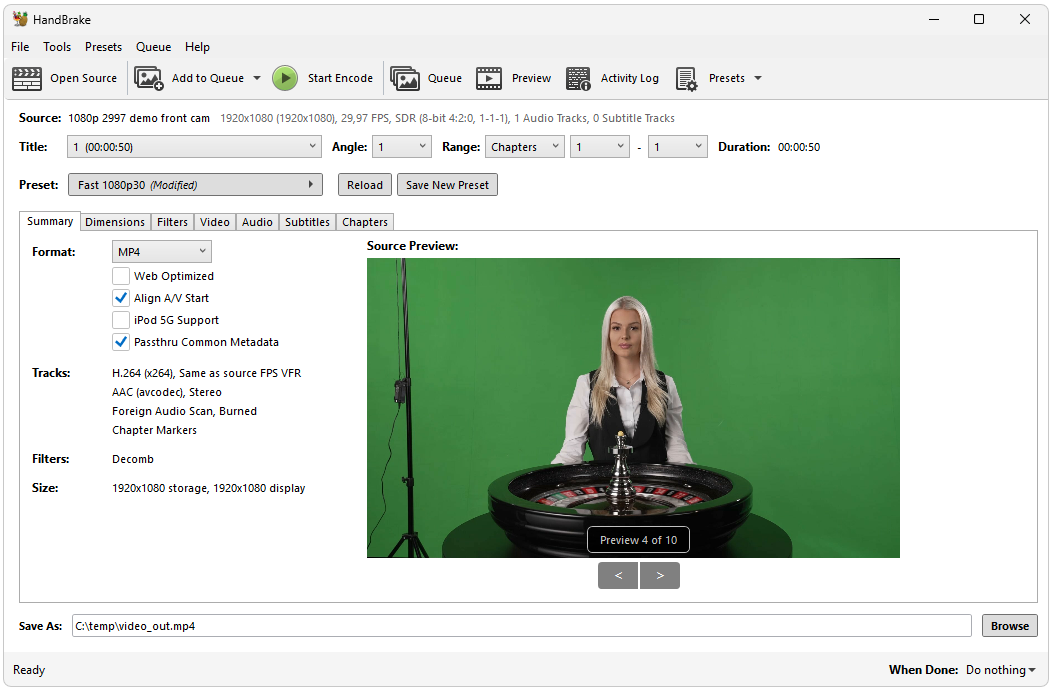
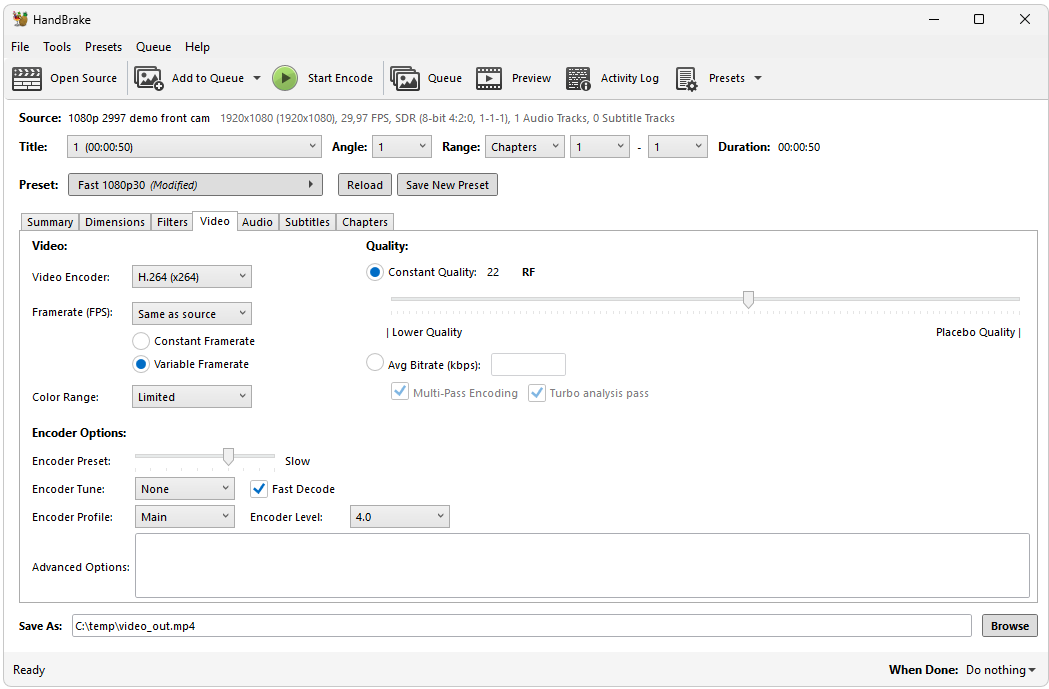
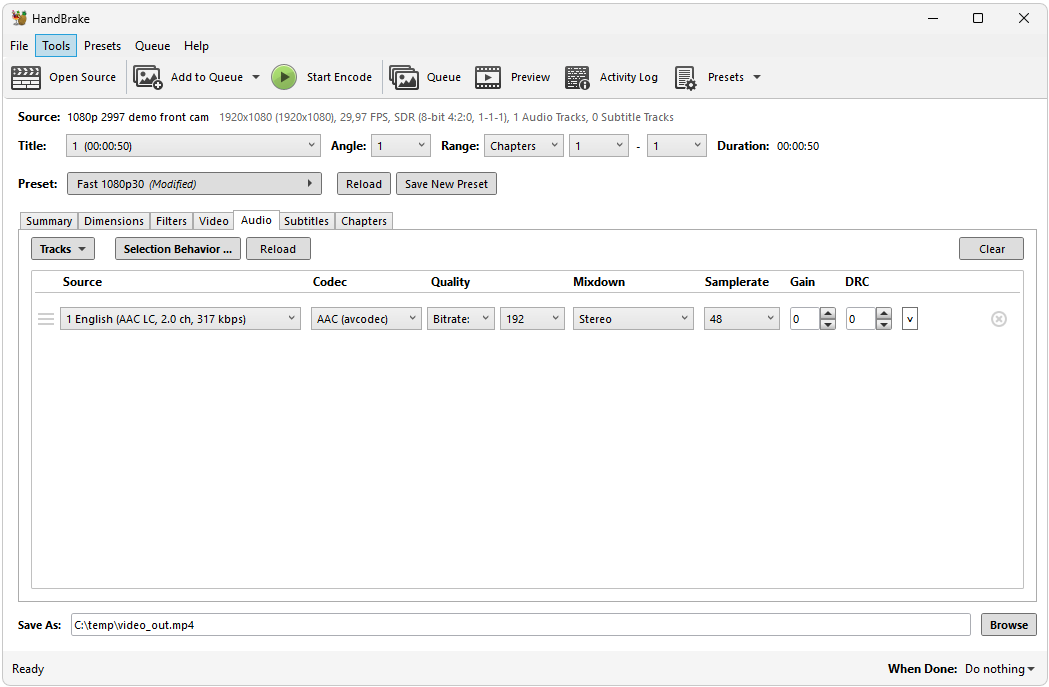
HandBrake
An excellent utility for transcoding media files is HandBrake. It is free and works for Windows, Mac, and Linux. These are the recommended key settings in Handbrake:
Make sure to save the output file with the .mp4 extension to ensure Composer recognizes it correctly.
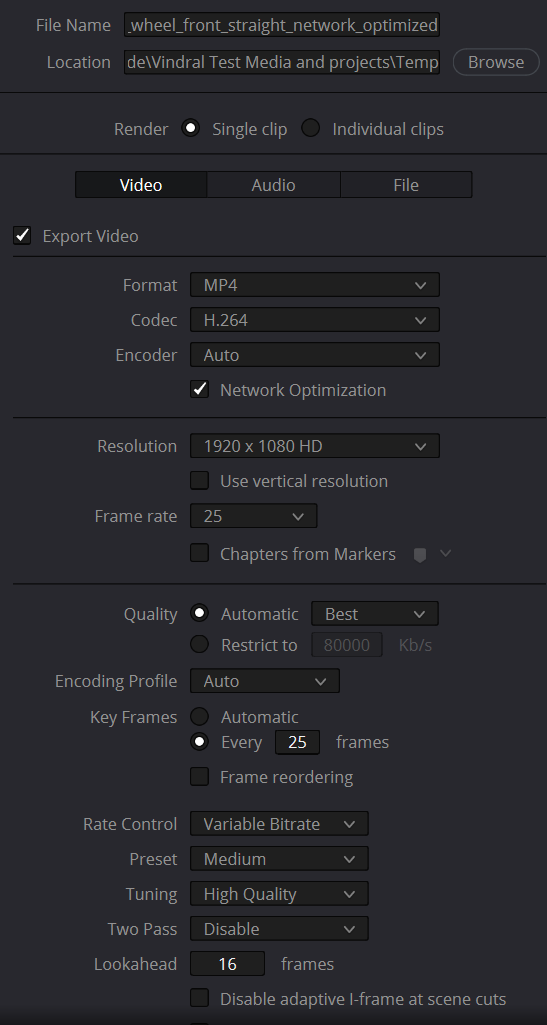
DaVinci Resolve
Another useful tool for converting video clips is Davinci Resolve: https://www.blackmagicdesign.com/products/davinciresolve
Clips exported from DaVinci Resolve is compatible with Composer. For efficient playback, we recommend the following settings:
- Format: mp4
- Codec: H.264 or H.265
- Network optimization: ON
- Frame reordering: OFF