Audio options
The expandable Audio section in an Input provides full control over how the audio signal is monitored, adjusted, and routed. From here, you can configure metering behavior, apply gain and panning, manage auxiliary sends, mute or solo a source, enable pre-fader listening, and remap audio channels. These controls let you shape the audio mix for both monitoring and output with precision.
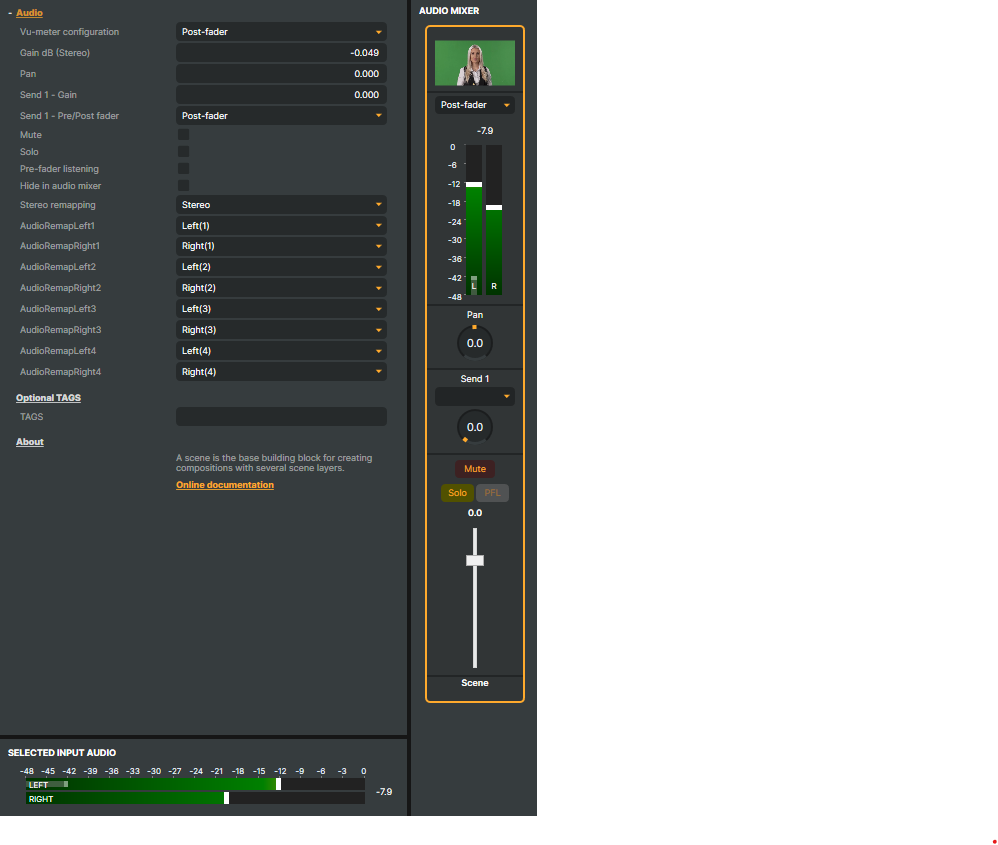
- Vu-meter configuration - Defines how the VU-meter represents audio levels in relation to the Gain dB (Stereo) option or the volume fader on the input’s audio strip in the Audio Mixer.
- Post-fader (default) - The VU-meter shows the audio level after the volume gain has been applied. This means the meter reflects the actual level that will be sent forward in the mix.
- Pre-fader - The VU-meter shows the raw audio level before any gain or mix changes. Use this mode when you want to monitor the original signal level, independent of mix adjustments.
- Gain dB (Stereo) - Sets the audio gain (volume level) in decibels. The value can also be adjusted using the volume fader on the input’s audio strip in the Audio Mixer. Positive values increase the level, negative values reduce it. This adjustment applies equally to both the left and right stereo channels.
- Pan - Adjusts the stereo balance between the left and right channels. Moving the control left increases left-channel volume and reduces right-channel volume, and vice versa. Panning can also be adjusted on the input’s audio strip in the Audio Mixer.
- Send 1 Gain - Controls the audio level sent to the auxiliary bus
Send 1. This allows you to create a secondary mix (for monitoring, recording, or effects processing) with a different level than the main mix. - Send 1 Pre/Post fader - Defines whether the signal sent to
Send 1is taken before or afterSend 1 Gain. - Mute - Silences the audio signal entirely, regardless of other settings. Muting an input can also be toggled by clicking the
 button on the input’s audio strip in the Audio Mixer.
 - Solo - Isolates the audio signal by muting all other sources. Only one input can be in Solo mode. Useful for focusing on a single input when mixing. Soloing an input can also be toggled by clicking the
 button on the inputs audio strip in the Audio Mixer.
 - Pre-fader listening (PFL) - Routes the signal to monitoring outputs before the gain is applied. This lets you preview or cue an input’s audio without affecting the main mix. PFL can also be toggled by clicking the
 button on the input’s audio strip in the Audio Mixer.Note:
Solo and Pre-fader Listening (PFL) does not affect the outgoing sound. These options are only audible when Audio Preview is active. To enable Audio Preview, click the
 icon, or select Preview -> Audio -> Toggle Preview On/Off from the menu.
 - Hide in audio mixer - Hides and removes the input from the Audio Mixer view without disabling its audio. Helpful for keeping the mixer uncluttered when dealing with many sources.
- Stereo remapping - Enables channel reassignment for the stereo output. You can swap or re-route left/right channels to fit specific speaker setups or processing requirements.
- AudioRemap Left/Right [1-8] - Provides fine-grained channel remapping. Each of the 8 possible channels can be explicitly assigned to either the left or right output.
Send 1 – Routing Audio to an Audio Channel Strip Input
You can route an input’s audio signal to another channel for sub-mixing or further processing using the Send 1 dropdown. If an Audio Channel Strip exists in your project, it will appear in the list, allowing you to send audio to that auxiliary bus and mix multiple inputs together before reaching the main output.
To use this feature:
- Add an Audio Channel Strip input.
- In the Send 1 dropdown of an input’s audio channel strip, select the desired Audio Channel Strip to route the audio.
- Adjust the Send 1 Gain or use the gain knob on the input’s audio strip to control the audio level sent to the Audio Channel Strip.
For information on creating and managing Audio Channel Strips, see Audio Channel Strips.